Note: The WordPress Toolkit extension is free with our Tera plans, and the Web Pro and the Web Host Plesk editions on a dedicated server or could VM. It is available for a fee for the Web Admin edition.
Maintenance Mode
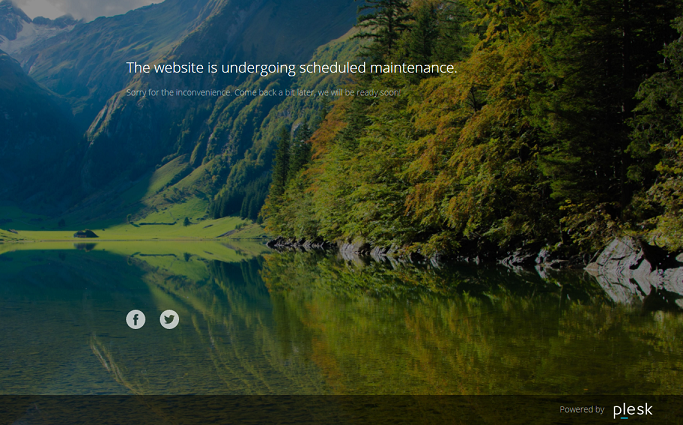
When a WordPress website enters maintenance mode, the website's content is hidden from visitors without being changed or otherwise affected. Visitors accessing your website when it is in maintenance mode see a maintenance screen webpage instead of the website content.

Switching on the maintenance mode
Your WordPress website enters maintenance mode automatically when you are:
- Upgrading your WordPress instance.
- Synchronizing WordPress instances via WordPress Toolkit.
If you are making changes to your website and want to temporarily hide it from visitors, you can manually put it into maintenance mode.
To put a WordPress website into maintenance mode:
- Go to WordPress and choose the WordPress instance you want to put into maintenance mode.
- Switch on “Maintenance mode” on the instance card.
To take your website out of maintenance mode, switch off “Maintenance mode”.
Customizing the maintenance page
With WordPress Toolkit, you can change certain attributes of the maintenance page to make it more informative. For example you can:
- Change the text displayed on the maintenance page.
- Add a countdown timer.
- Provide or remove links to social network pages.
To customize the maintenance page:
- Go to WordPress, choose the WordPress instance whose maintenance page you want to customize, and then click “Setup” next to “Maintenance mode” on the instance card.
- In the Screen Text section, you can change the text displayed. Use HTML tags to format the text's appearance.
- In the Timer section, you can set up and switch on the countdown timer that will be displayed on the maintenance page.
Note: The timer is only meant to inform visitors about the estimated duration of the remaining downtime. Your website is not taken out of maintenance when the countdown is finished; you must do that manually.
- In the Social Network Links section, provide or remove links to social network pages (Facebook, Twitter, and Instagram).
- Click OK.
If you have coding skills, you can customize the maintenance page beyond the options described above. You can do this for a particular WordPress website or for all WordPress websites hosted on the server.
To customize the maintenance page for a particular website:
- Go to WordPress, choose the WordPress instance whose maintenance page you want to customize, and then click “Setup” next to “Maintenance mode” on the instance card.
- Click Customize and edit the maintenance page template in Code Editor.
- Click OK.
To customize the maintenance page for all WordPress websites hosted on the server:
- Edit the server-wide maintenance page template:
(Plesk for Linux)
/usr/local/psa/var/modules/wp-toolkit/maintenance/template.phtml(Plesk for Windows)
%plesk_dir%\var\modules\wp-toolkit\maintenance\template.phtml - When you put a WordPress website in maintenance mode for the first time, the customized maintenance page template is applied automatically.
The customized server-wide maintenance page template is applied only to WordPress websites that had never been put in maintenance mode before. To apply it to a WordPress website that had already been put in maintenance mode, do the following:
- Go to WordPress and choose the WordPress instance to which you want to apply the customized server-wide maintenance page template.
- Click “Setup” next to “Maintenance mode” on the instance card and then click Restore Default.
This replaces the website-specific maintenance page with a copy of the server-wide template.
Restoring the default maintenance page
If necessary, you can restore the default maintenance page. You do it differently depending on whether you have customized the server-wide template or not.
To restore the default maintenance page if the server-wide template has not been changed:
- Go to WordPress and choose the WordPress instance whose maintenance page you want to reset to default.
- Click “Setup” next to “Maintenance mode” on the instance card and then click Restore Default.
To restore the default maintenance page if the server-wide template has been changed:
- Revert the changes made to the server-wide maintenance page template by replacing the file:
(Plesk for Linux)
/usr/local/psa/admin/plib/modules/wp-toolkit/resources/maintenance/template.phtml(Plesk for Windows)
%plesk_dir%\admin\plib\modules\wp-toolkit\resources\maintenance\template.phtmlwith the following file:
(Plesk for Linux)
usr/local/psa/var/modules/wp-toolkit/maintenance/template.phtml(Plesk for Windows)
%plesk_dir%\var\modules\wp-toolkit\maintenance\template.phtml - When you put a WordPress website in maintenance mode for the first time, the default maintenance page template is applied automatically.
The default server-wide maintenance page template is applied only to WordPress websites that had never been put in maintenance mode before. To apply it to a WordPress website that had already been put in maintenance mode, do the following:
- Go to WordPress and choose the WordPress instance whose maintenance page you want to reset to default.
- Click “Setup” next to “Maintenance mode” on the instance card and then click Restore Default.
This replaces the website-specific maintenance page with a copy of the default server-wide template.

Comments
0 comments
Article is closed for comments.