We use Microsoft Office 2013 in this article, however the general steps apply to all other versions of Microsoft Office where the Import/Export feature is typically found under the File Menu.
Important Note:
If correctly generated, a .pst file will contain all your email, contacts, calendars etc. for that email account - where setup as type: IMAP; Exchange; Office 365.Since this is the case, it is imperative that you keep this file safe and secure. Additionally exporting the information will not remove the email from the server, it simply copies it.
Exporting Emails Using Microsoft Office
The following steps will show you how to export your emails through Microsoft Office and generate a .pst file.
If you have multiple accounts listed in your Outlook profile, ensure you first select the correct set of folders i.e. the top level folder for the email account, or Inbox folder, in the folder list (on the left).
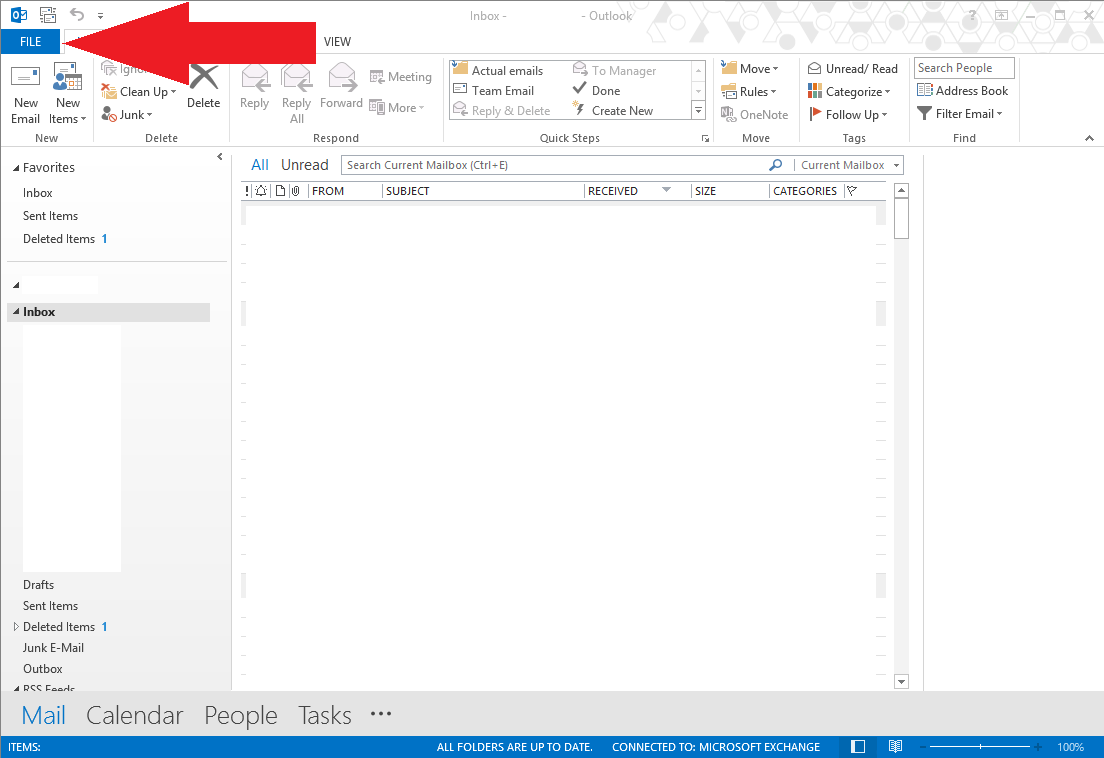
1) Click on "File" at the top left corner of the window.
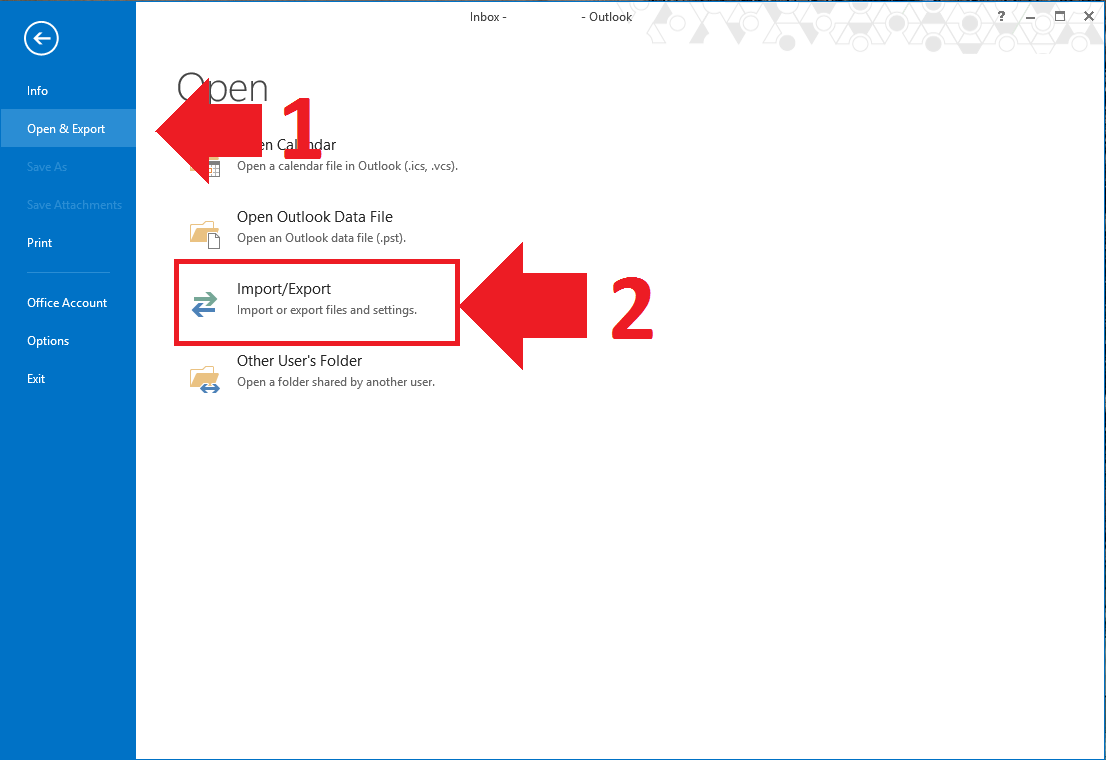
2) Choose "Open & Export".
- In Office 2010: "File" >> "Open" and "Import".
- In Office 2007: "File" >> "Import & Export".
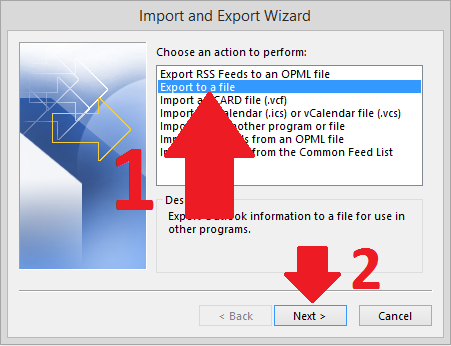
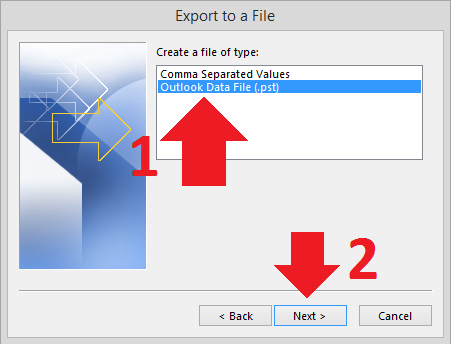
3) Choose "Export to a file" option, followed by "Outlook Data File (.pst)"
4) Choose the name of the folder.
This is normally your name or a pseudonym for the Inbox and then click Next.

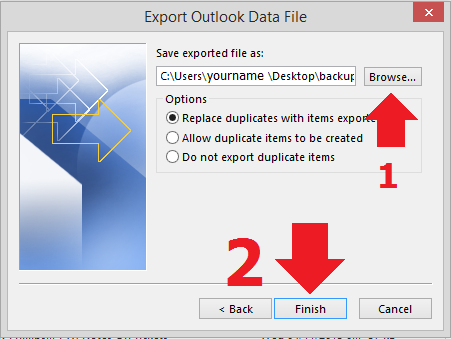
5) Choose where you wish to place the file.
This can be anywhere, but for ease, we are going to place it on the Desktop and click Finish
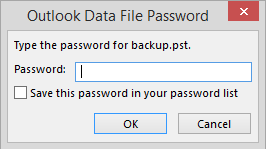
6) Set a password for the file.
Note: This final step is optional - if you wish to continue without a password simply click OK.
You will require this password when you go to Import the file - as such it is very important that you safely note down what the password is; click OK when you have entered the password.

As a precaution, you will be prompted to enter the password again.
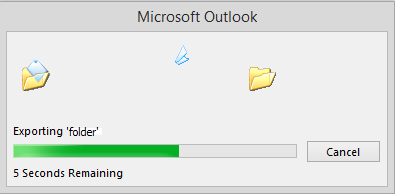
7) Exporting Process
Once you click OK, your emails will start to export into the .pst file; this could take sometime, depending on how many emails that you have and how fast your internet connection is.
When it is complete, you will have a .pst file on your Desktop (or wherever you chose to save the file to).
You have now successfully exported your emails using Microsoft Office.
Opening the PST file as a local folder in Outlook
1) Click on "File" at the top left.
2) Click on "Import/Export" and then "Open Outlook Data File"
3) Select your file and click "Open"
4) It will appear at the bottom of your folder list as "Outlook Data File"
Importing Emails Using Microsoft Office
Important Note:
Typically you would import email when your email account is setup as type: IMAP; Exchange; Office 365.
This process can take quite sometime, depending on the speed of the internet connection you have, as the email will be pushed back up to the server. It is also important to note how much email is to be pushed back up to the server, to ensure that you have enough available free space to carry out the import.
Note also that depending on the layout of the folders in your existing, and new email account, you may need to move email/folders around into their respective folders (in the new email account); this process may take quite some time to complete.
If at all possible, try to sort the email in the .pst file before carrying out the import - however before making any changes to the file make sure you have a copy of the file, should any issues arise.
The following steps will show you how to import your emails through Microsoft Office.
1) Click on "File" at the top left corner of the window.

2) Choose "Open & Export"
- In Office 2010: "File" >> "Open" and "Import".
- In Office 2007: "File" >> "Import & Export".

3) Choose "Import from another program or file" followed by "Outlook Data File (.pst)".


4) Choose where your .pst file is located and click "Next".
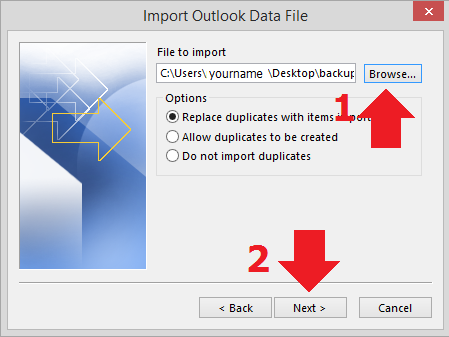
5) If you have a password on your .pst file please enter this when prompted, then click OK.

6) Choose how you wish to import the emails into Outlook and click "Finish".
You have now successfully imported your emails into Microsoft Outlook.
Further Queries
If you have any queries on this, please contact our Support team - see the following for our contact details:
- https://www.blacknight.com/contact-us.html

Comments
0 comments
Article is closed for comments.